Roles and permissions
Owner designs permission packs. Team assigns those packs to people.
-
Step 1
Open Roles & Permissions
Settings → Roles & Permissions. Only the Owner sees this page.
Screenshots show the English workspace UI.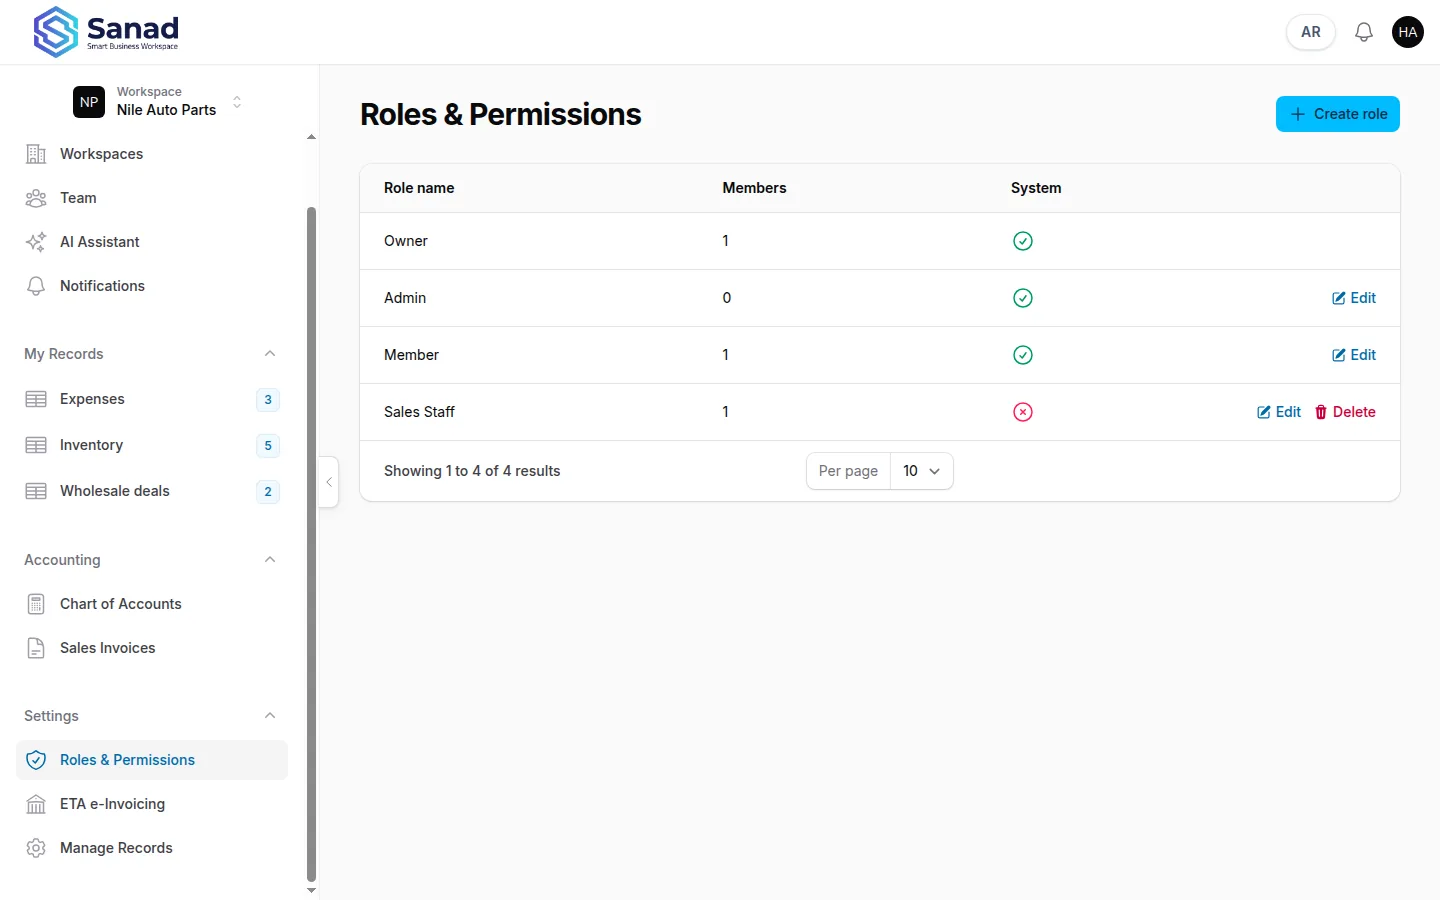
-
Step 2
Create a role
Create role, enter a name (Cashier, Accountant, Data entry). Tick permissions by area: Records, Manage Records, Chart of Accounts, Sales Invoice, ETA e-Invoicing, Team, AI Assistant. Under Sales Invoice, Sales Invoice — Return is a separate action for creating sales returns; it does not turn on List. Save. Nobody has the role yet.
Screenshots show the English workspace UI.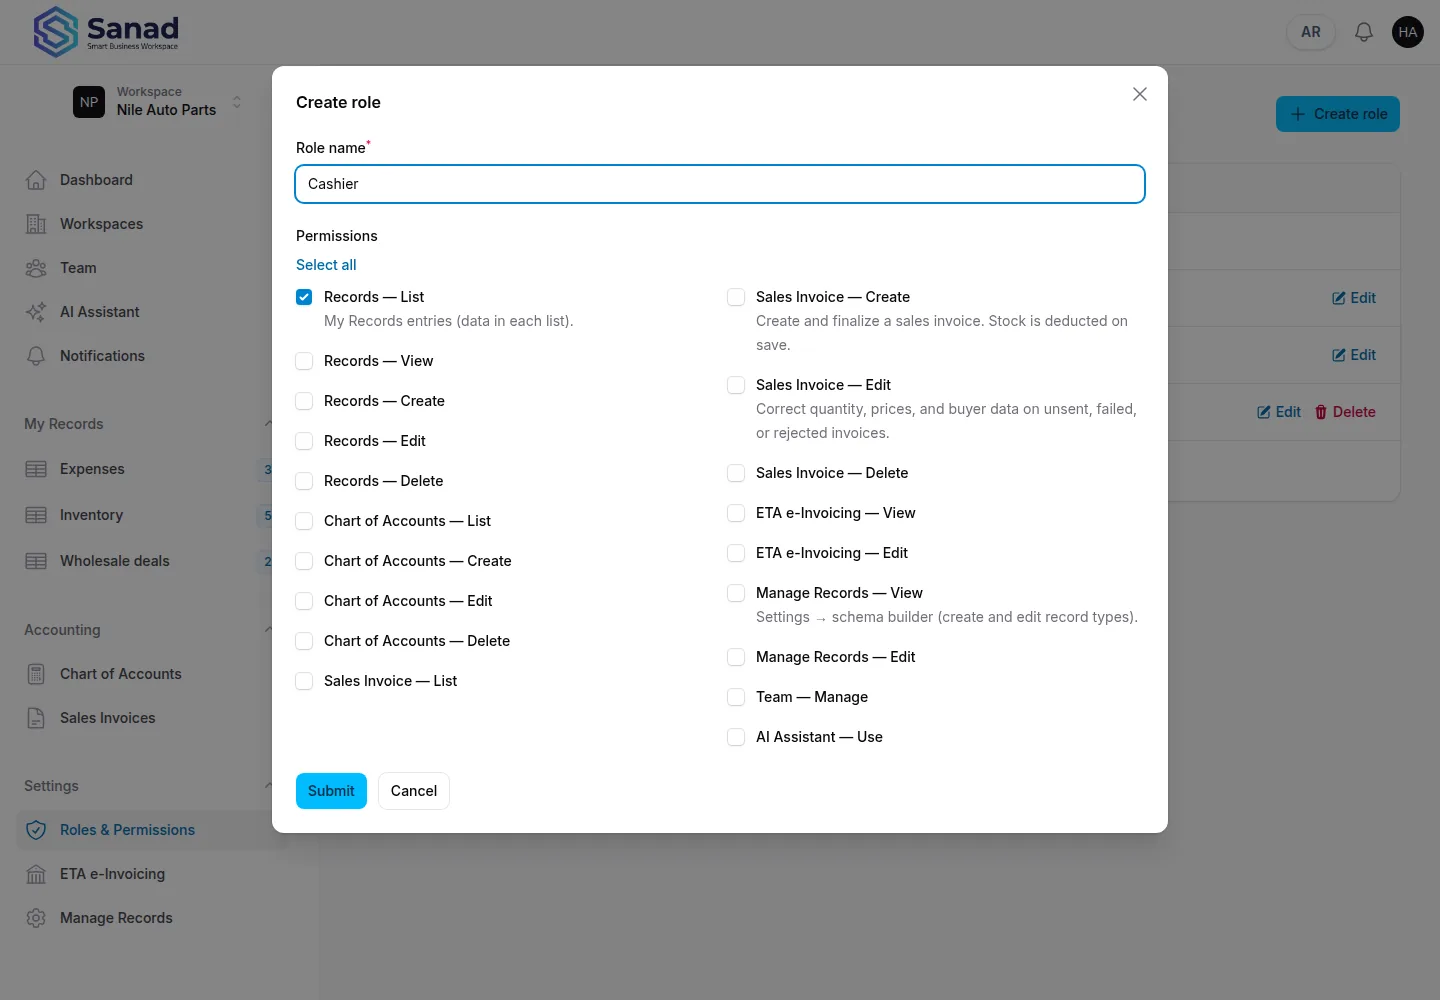
-
Step 3
How checkboxes work
Ticking Create, Edit, or Delete turns on List for that area (Records, Manage Records, Chart of Accounts, Sales Invoice). Sales Invoice — Return does not auto-enable List. For ETA e-Invoicing, ticking Edit turns on View. Team only has Manage; AI Assistant only has Use. Records — View is separate and not turned on automatically. Modules the plan does not include are greyed out: Upgrade your plan to enable this module.
Screenshots show the English workspace UI.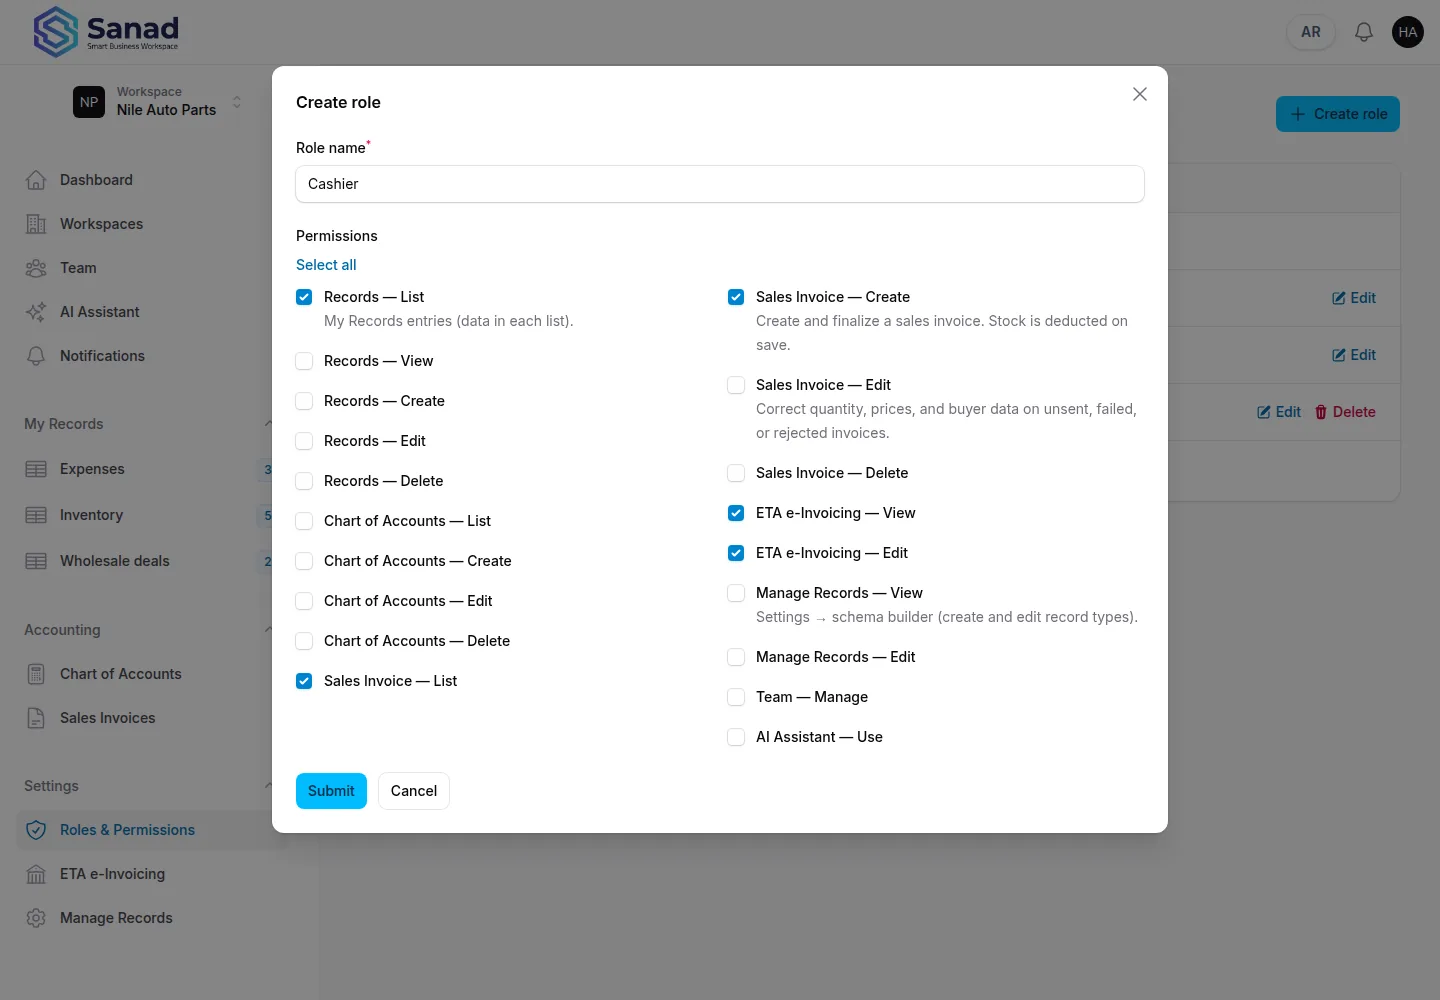
-
Step 4
Built-in roles
Owner: full access, cannot be edited or deleted. Admin and Member: you may change their checkboxes. You cannot delete a custom role that still has members or pending invites — reassign and revoke first.
Screenshots show the English workspace UI.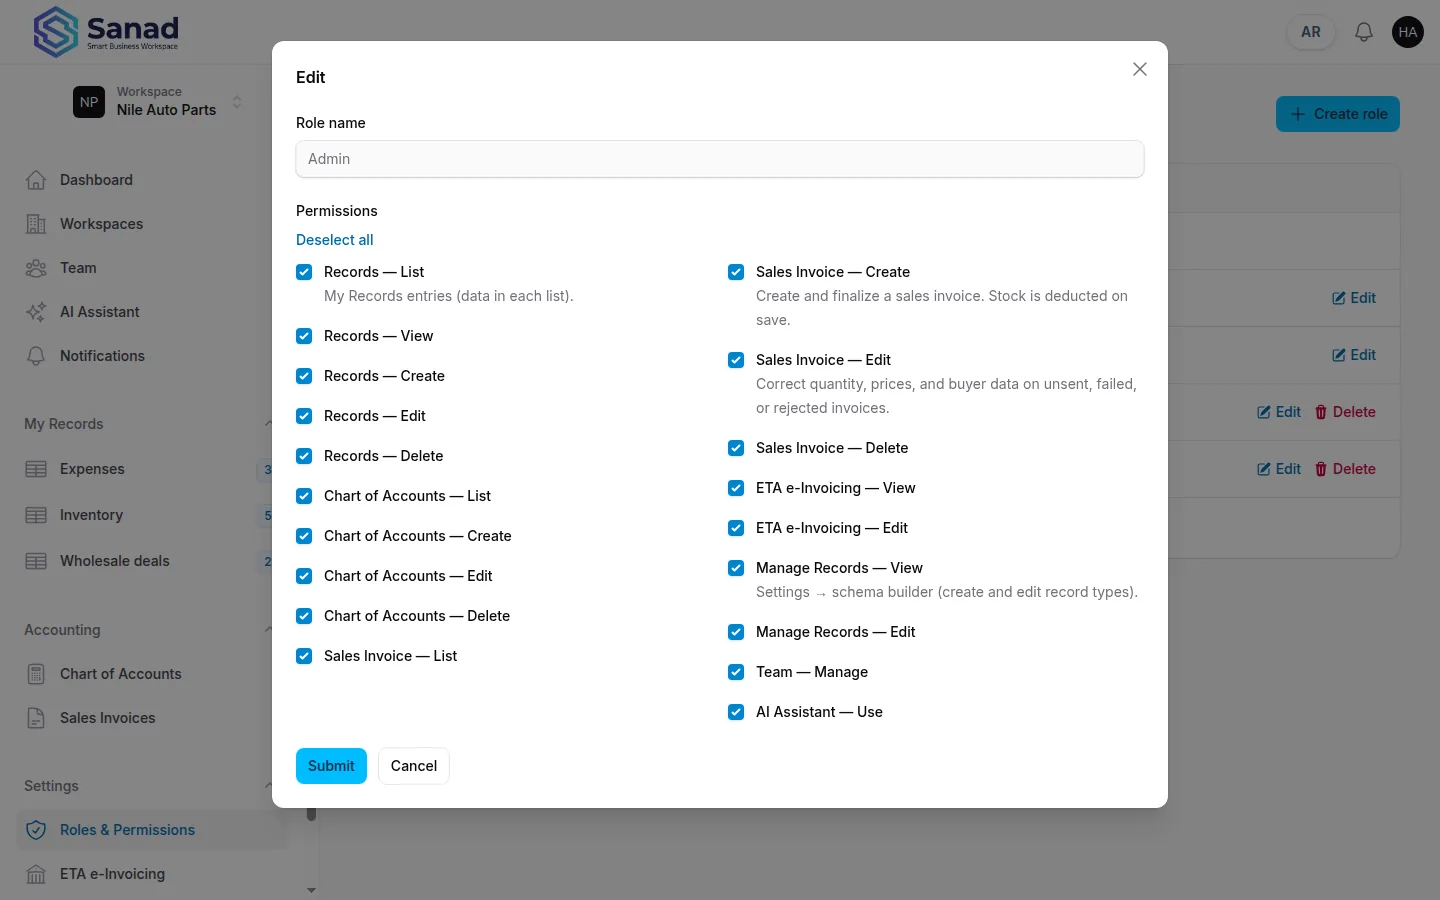
-
Step 5
Assign the role on Team
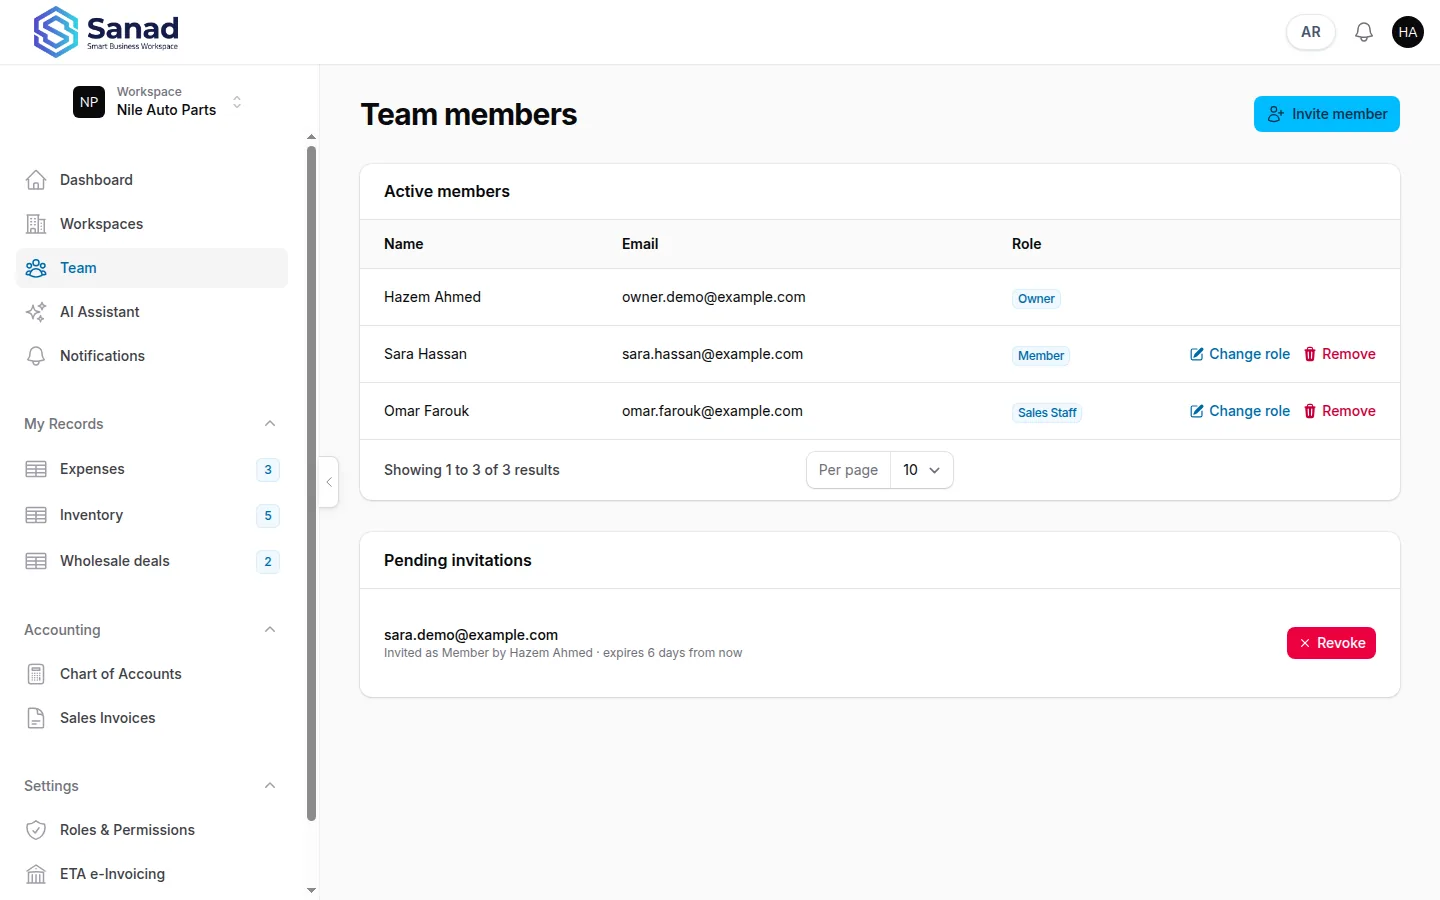
New person: Team → Invite member → email + that role. Already a member: Team → Change role. Pending invite has a role baked in — revoke and invite again to change it. The Owner role cannot be given to anyone else.
Screenshots show the English workspace UI.