Team and invitations
Invite people by email, pick a role, change roles later, or revoke pending invites.
-
Step 1
Open Team
Team in the left menu is for the current workspace. Creating a role in Settings does not attach anyone until you invite them or change their role here.
Screenshots show the English workspace UI.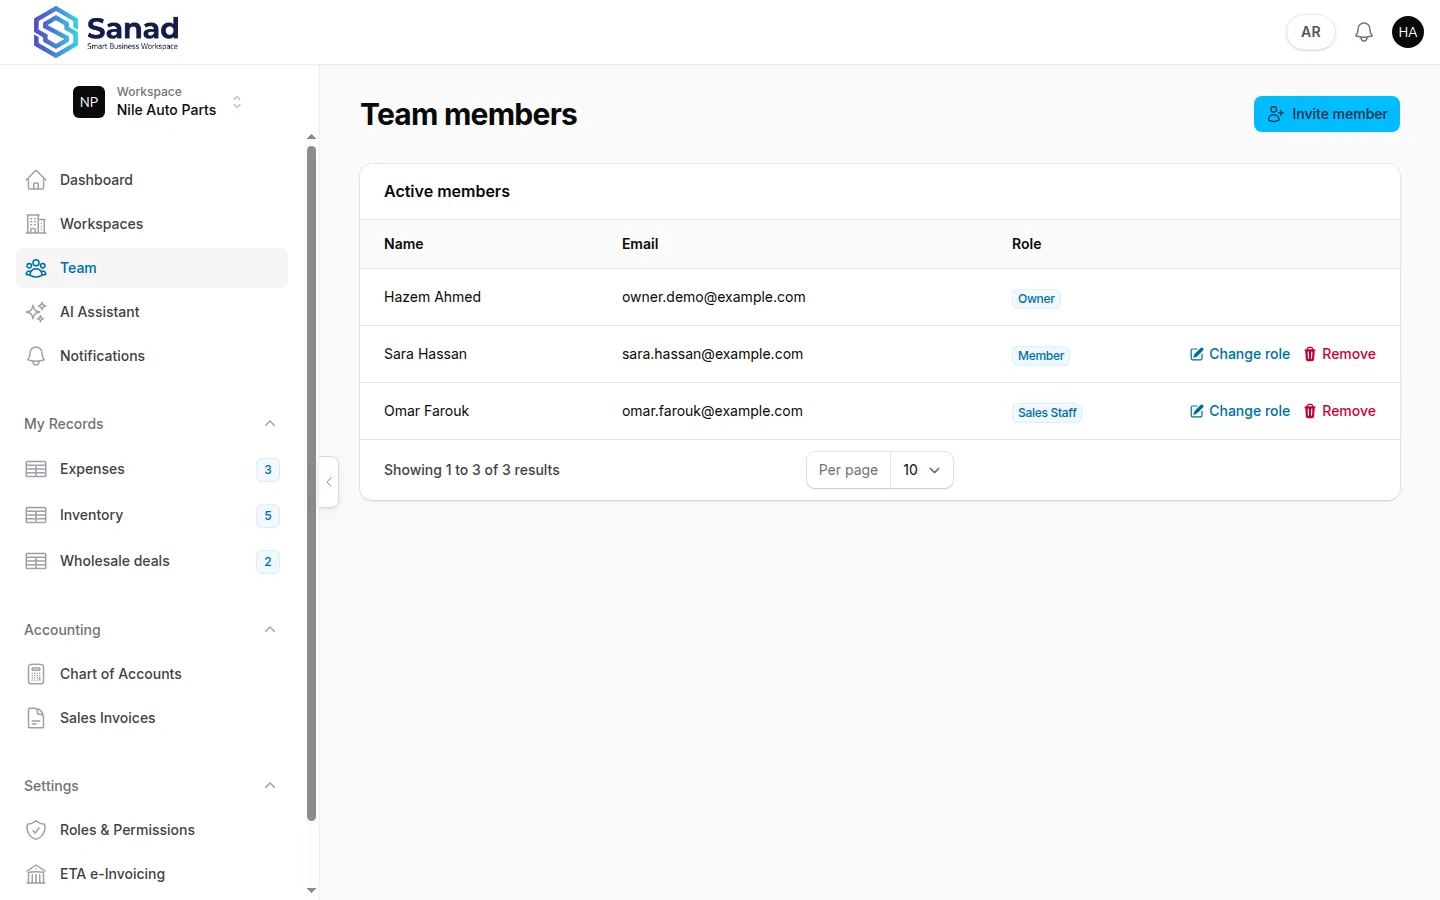
-
Step 2
Invite member
Click Invite member and enter their email. Submit. The screen shows Invitation sent. Default invite role is Member.
Screenshots show the English workspace UI.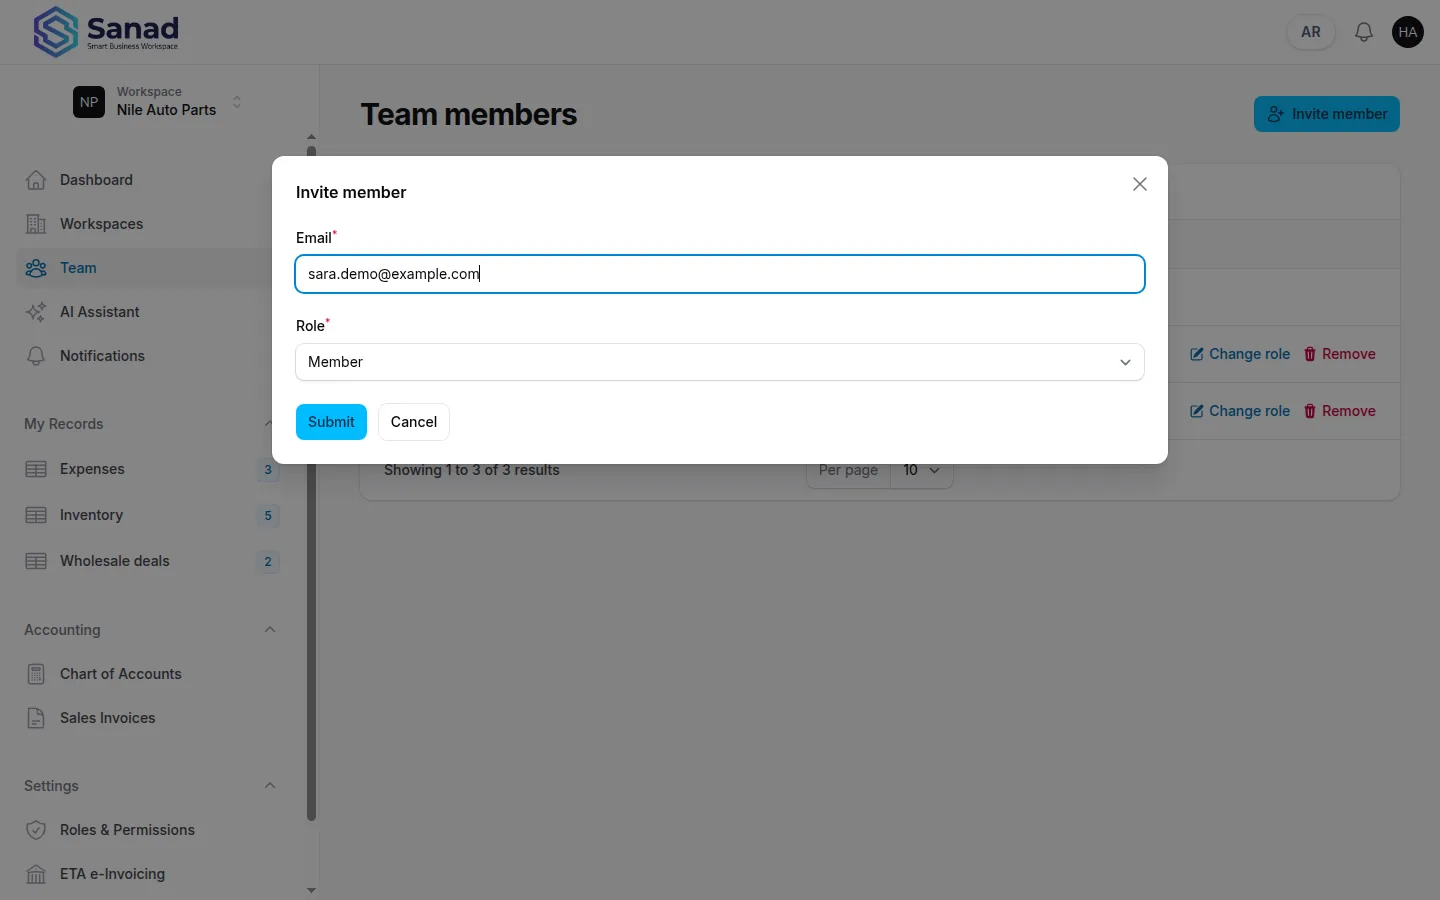
-
Step 3
Choose a role
Pick Admin, Member, or a custom role — never Owner. Existing Sanad users join this workspace after they accept the invite email; new users set a password (or complete signup) first. After accept they appear under Active members with that role.
Screenshots show the English workspace UI.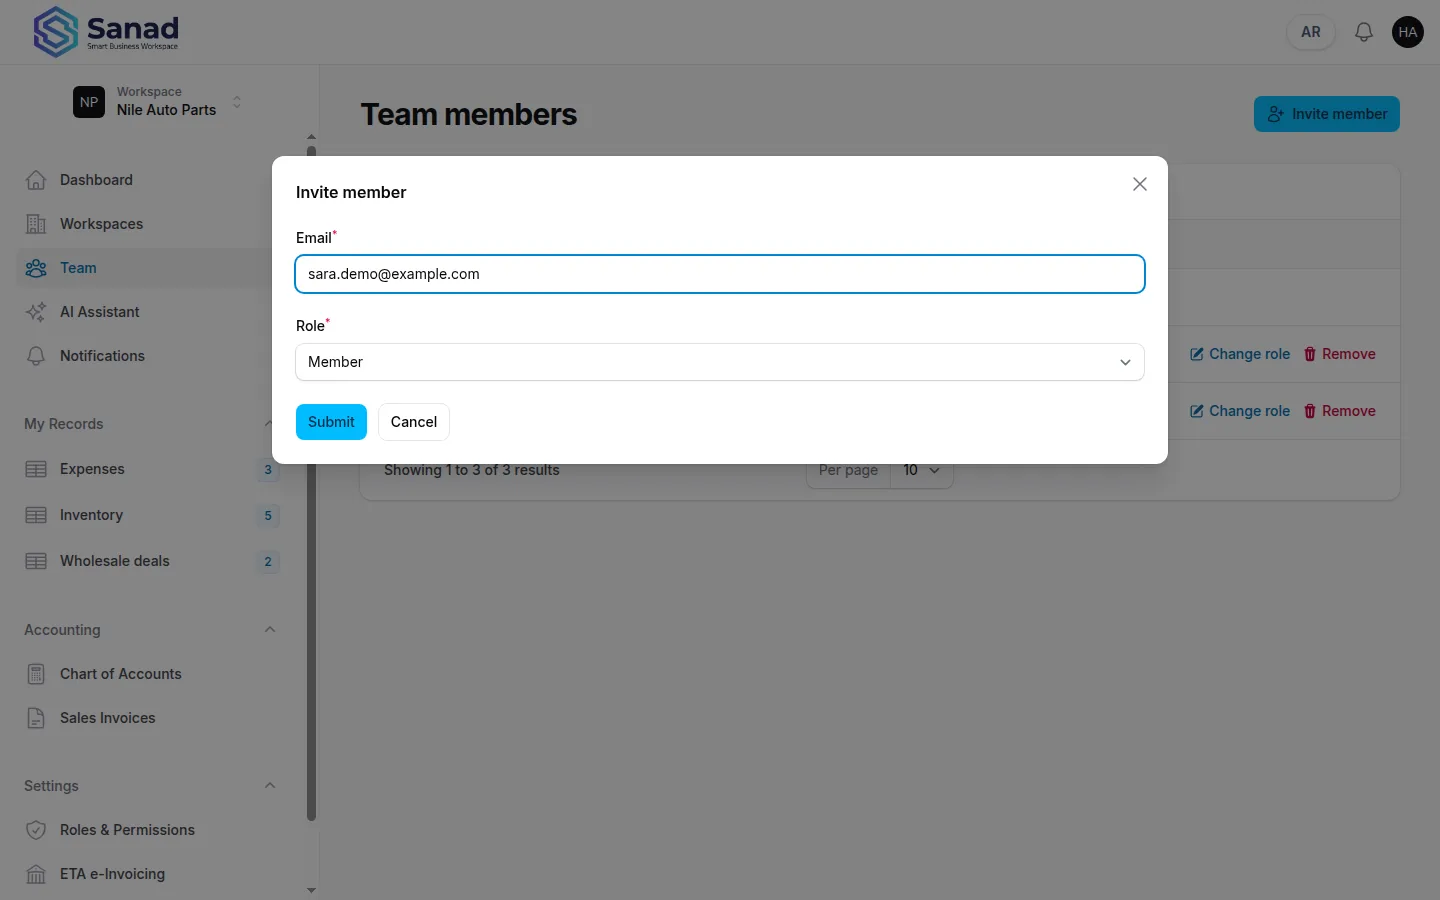
-
Step 4
Pending invitations
Waiting invites stay under Pending invitations. Revoke if you sent the wrong address. Pending invites count toward the member cap. Invites expire. Limit: 20 invitations per hour.
Screenshots show the English workspace UI.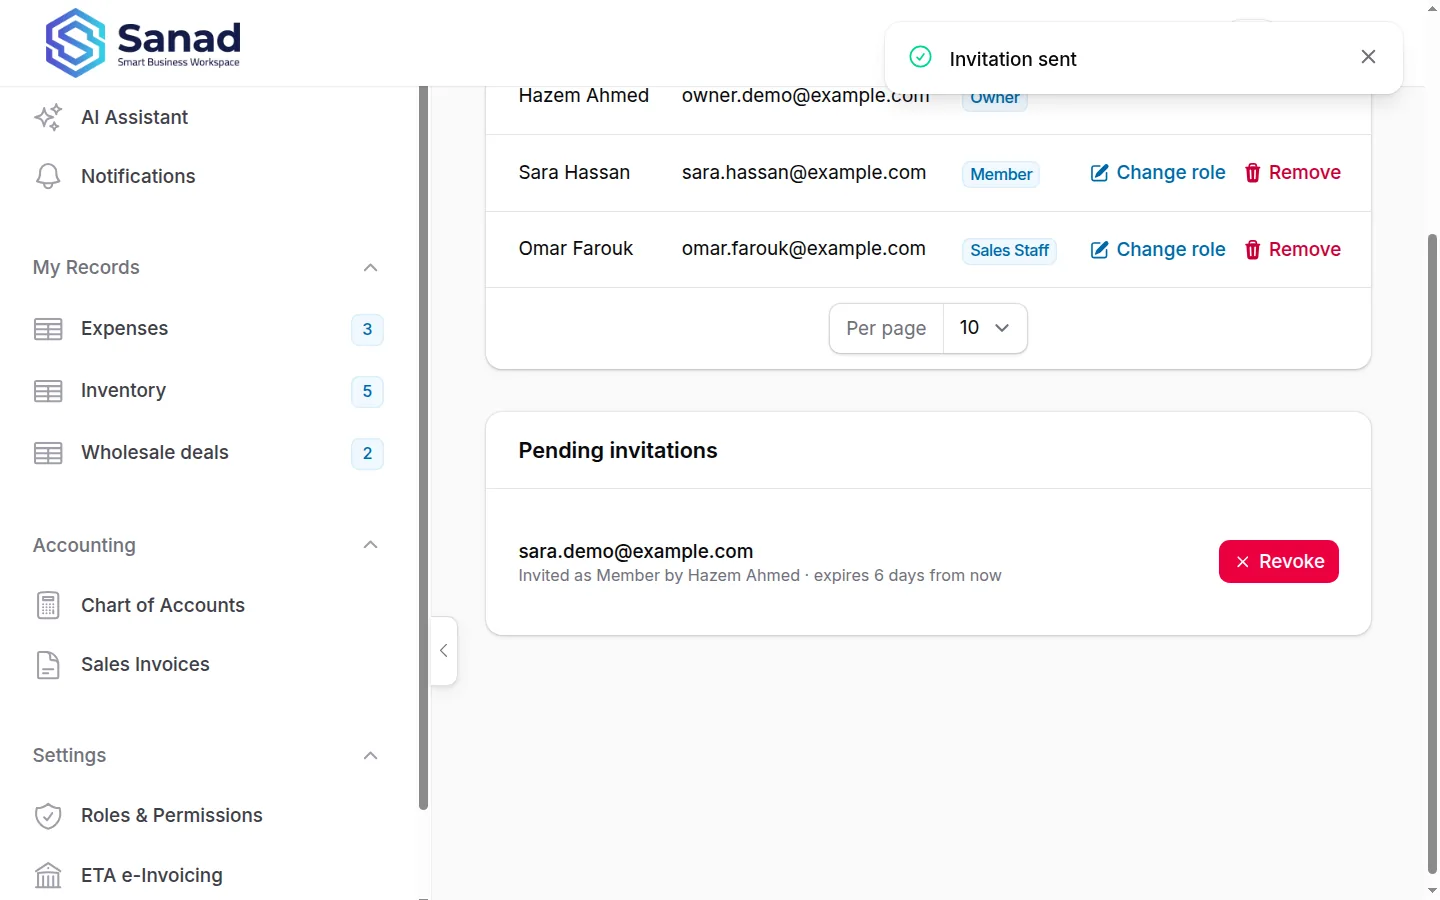
-
Step 5
Change role
On Active members, Change role, pick Admin, Member, or a custom role. They immediately get that role’s permissions in this workspace.
Screenshots show the English workspace UI.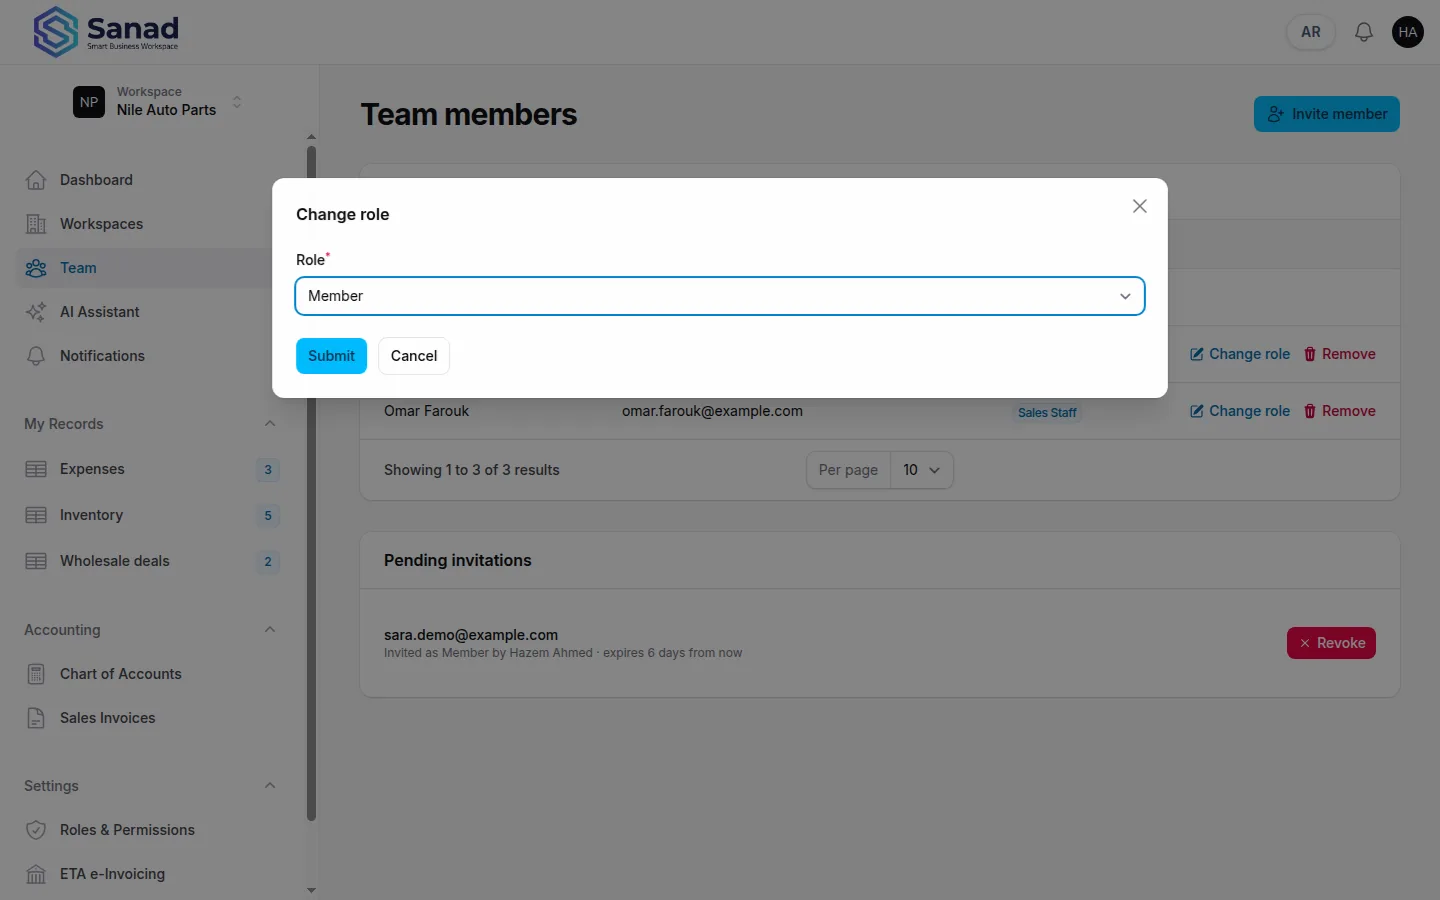
-
Step 6
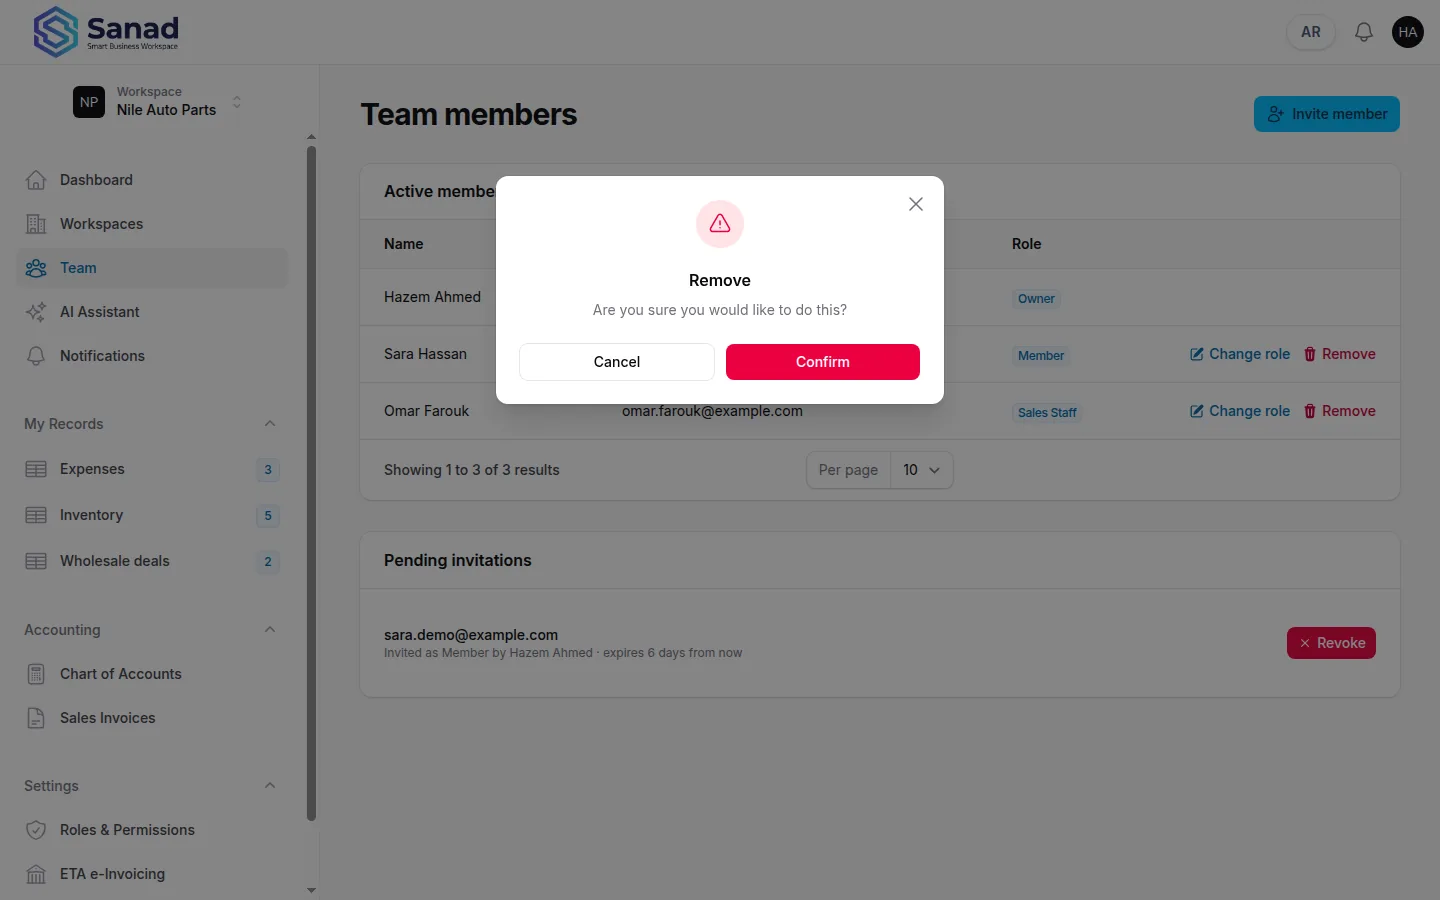
Remove a member
Remove takes them out of this workspace. Their Sanad login still exists. You cannot remove the Owner.
Screenshots show the English workspace UI.