Create an account and first hour
Sign up, open the workspace as Owner, then fill the Business / invoice profile. Team, lists, and invoices have their own guides.
-
Step 1
Open Get Started Free
On the public site choose Get Started Free, or use the register link on the login screen. No credit card is required for the free plan.
Screenshots show the English workspace UI.
-
Step 2
Fill your details and pick a plan
Enter full name, email, password, workspace name, and a plan. Confirm your email when prompted.
Screenshots show the English workspace UI.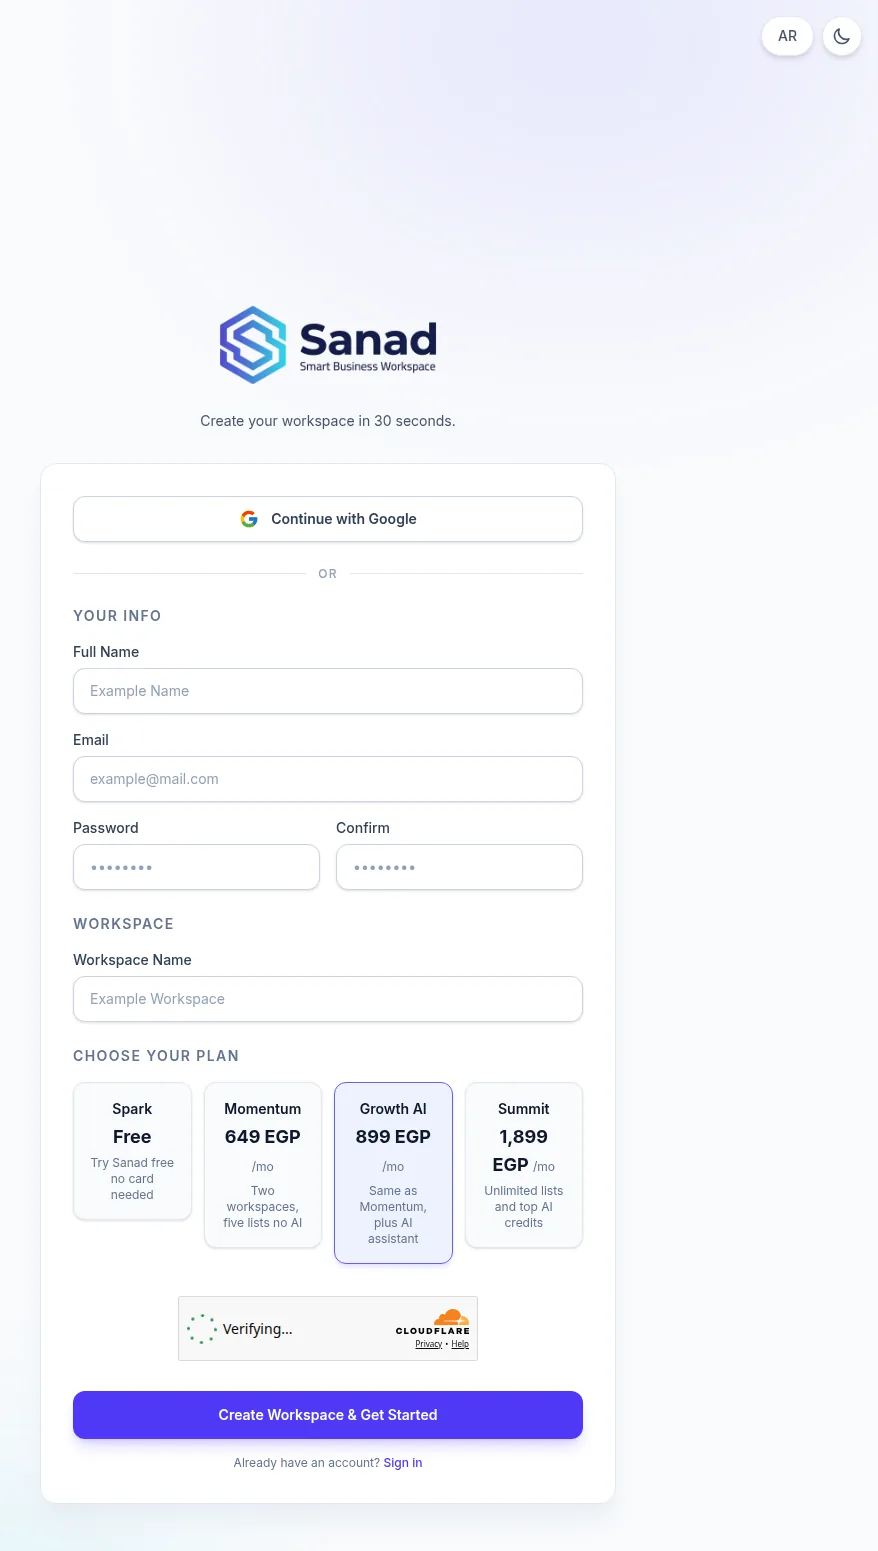
-
Step 3
Open the workspace as Owner
After signup you open the workspace app as Owner. The home dashboard starts empty until you add lists. If you chose a paid plan, you may see Payment confirmation required until a Sanad operator activates the subscription. That screen is covered in Plans and billing.
Screenshots show the English workspace UI.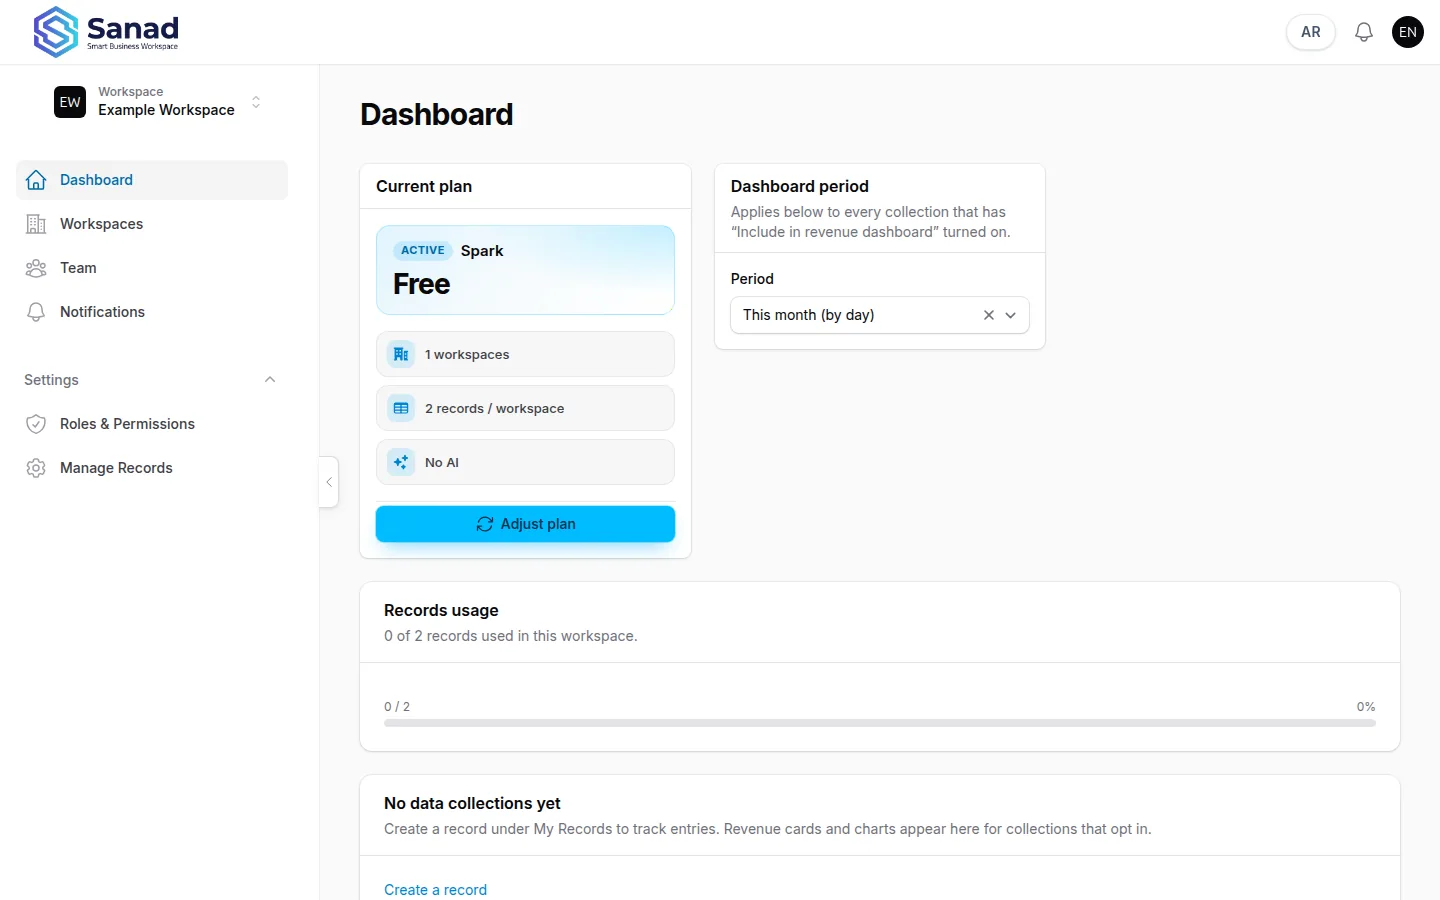
-
Step 4
Fill the Business / invoice profile
Open workspace settings and complete Business / invoice profile if you will print invoices or use ETA: legal name, tax RIN, activity code, and invoice prefix. Next, invite people from Team, then create a list in Manage Records. Sales invoices and ETA have their own guides if your plan includes them.
Screenshots show the English workspace UI.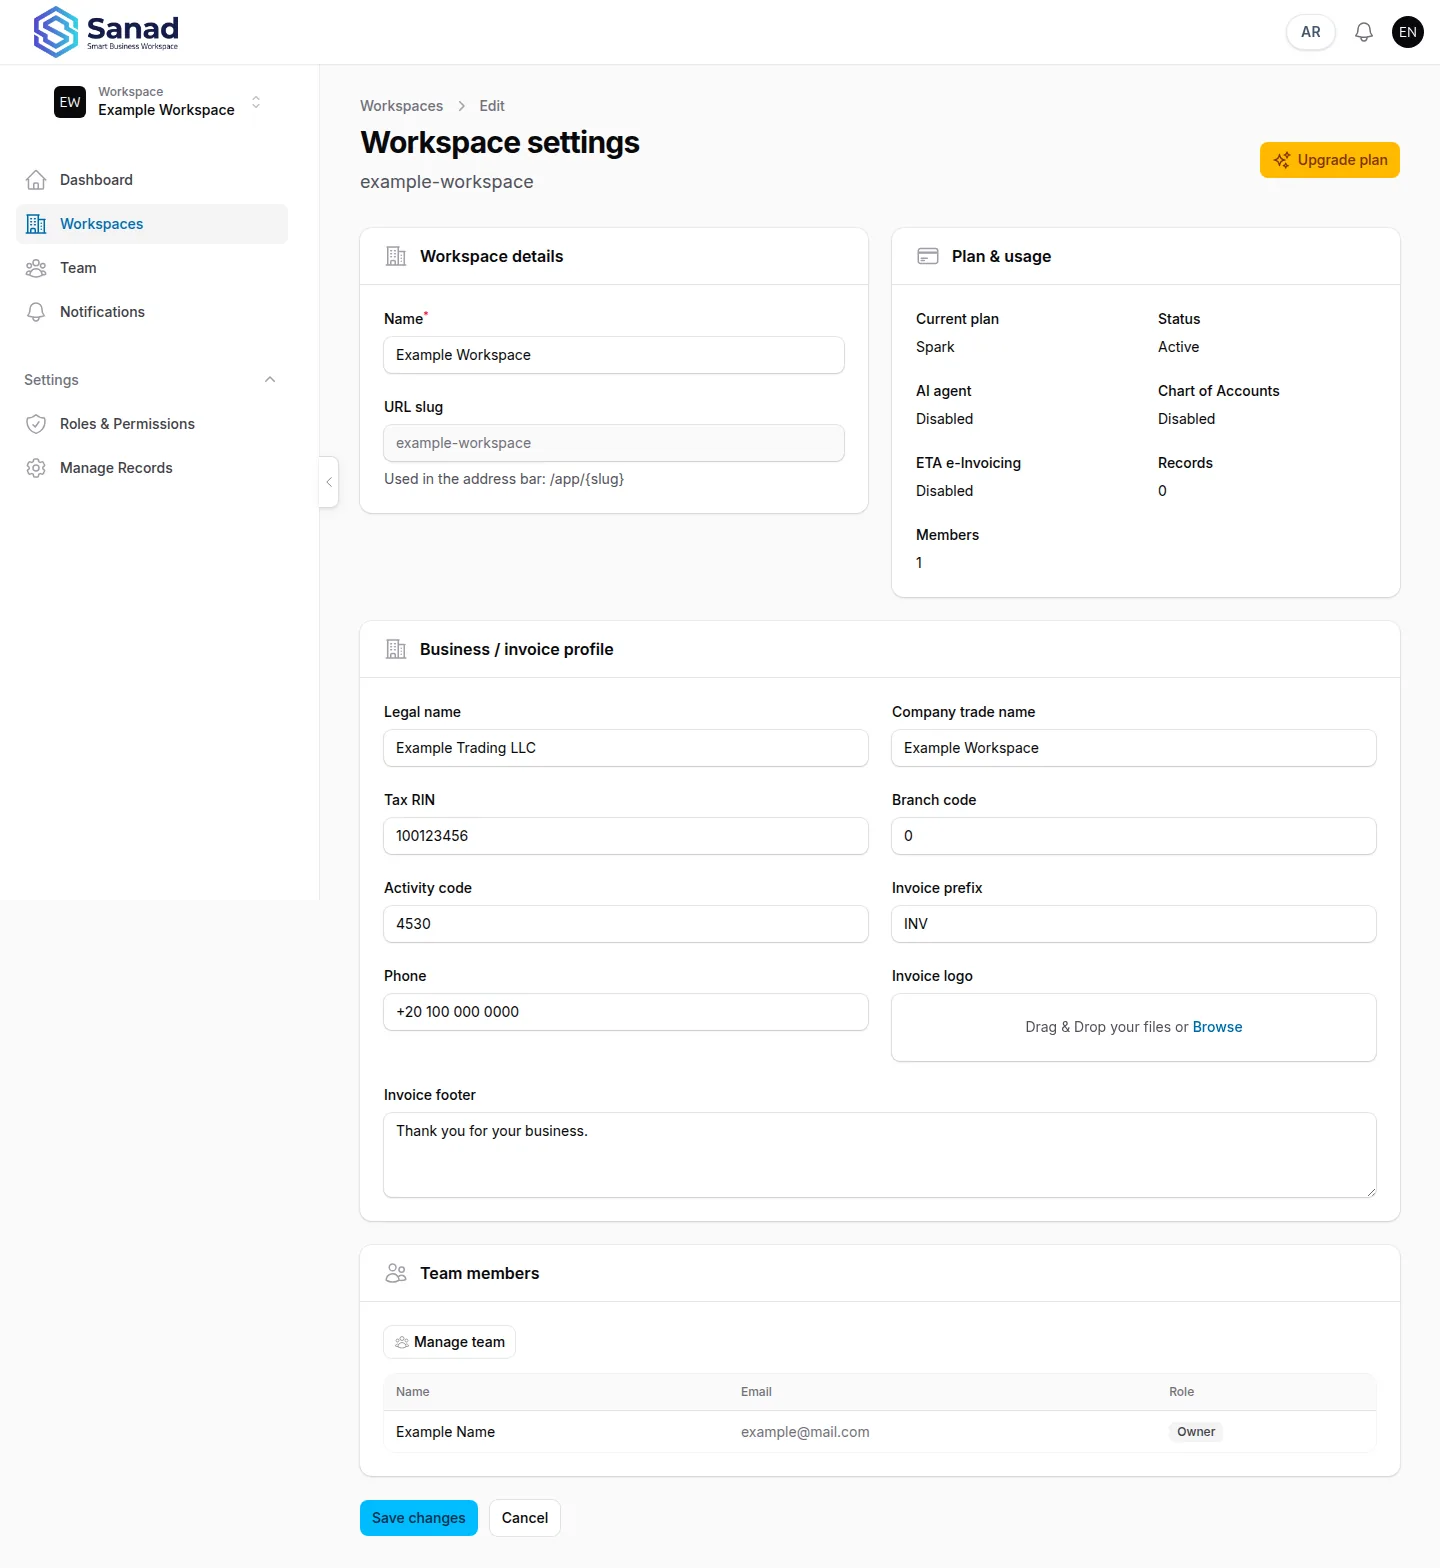
Related articles
Workspaces
Switch, create, and configure company spaces you own — including the invoice business profile.
Team and invitations
Invite people by email, pick a role, change roles later, or revoke pending invites.
Design a record list
Create a custom list: pick a template or start blank, set the name and dashboard options, add columns, then save. Daily entry is in My Records.
Plans and billing
What each plan unlocks, how to request a change, and what Pending payment means.