Inventory records on invoices and ETA
Turn a product list into invoice lines that print locally and submit to the Egyptian Tax Authority.
-
Step 1
Make the inventory list
Settings → Manage Records → Create. Start from a template, Industry template Inventory. The four Inventory role values are Item name, Barcode, Stock quantity, and Sale price. Only lists with all four appear under Inventory record.
Screenshots show the English workspace UI.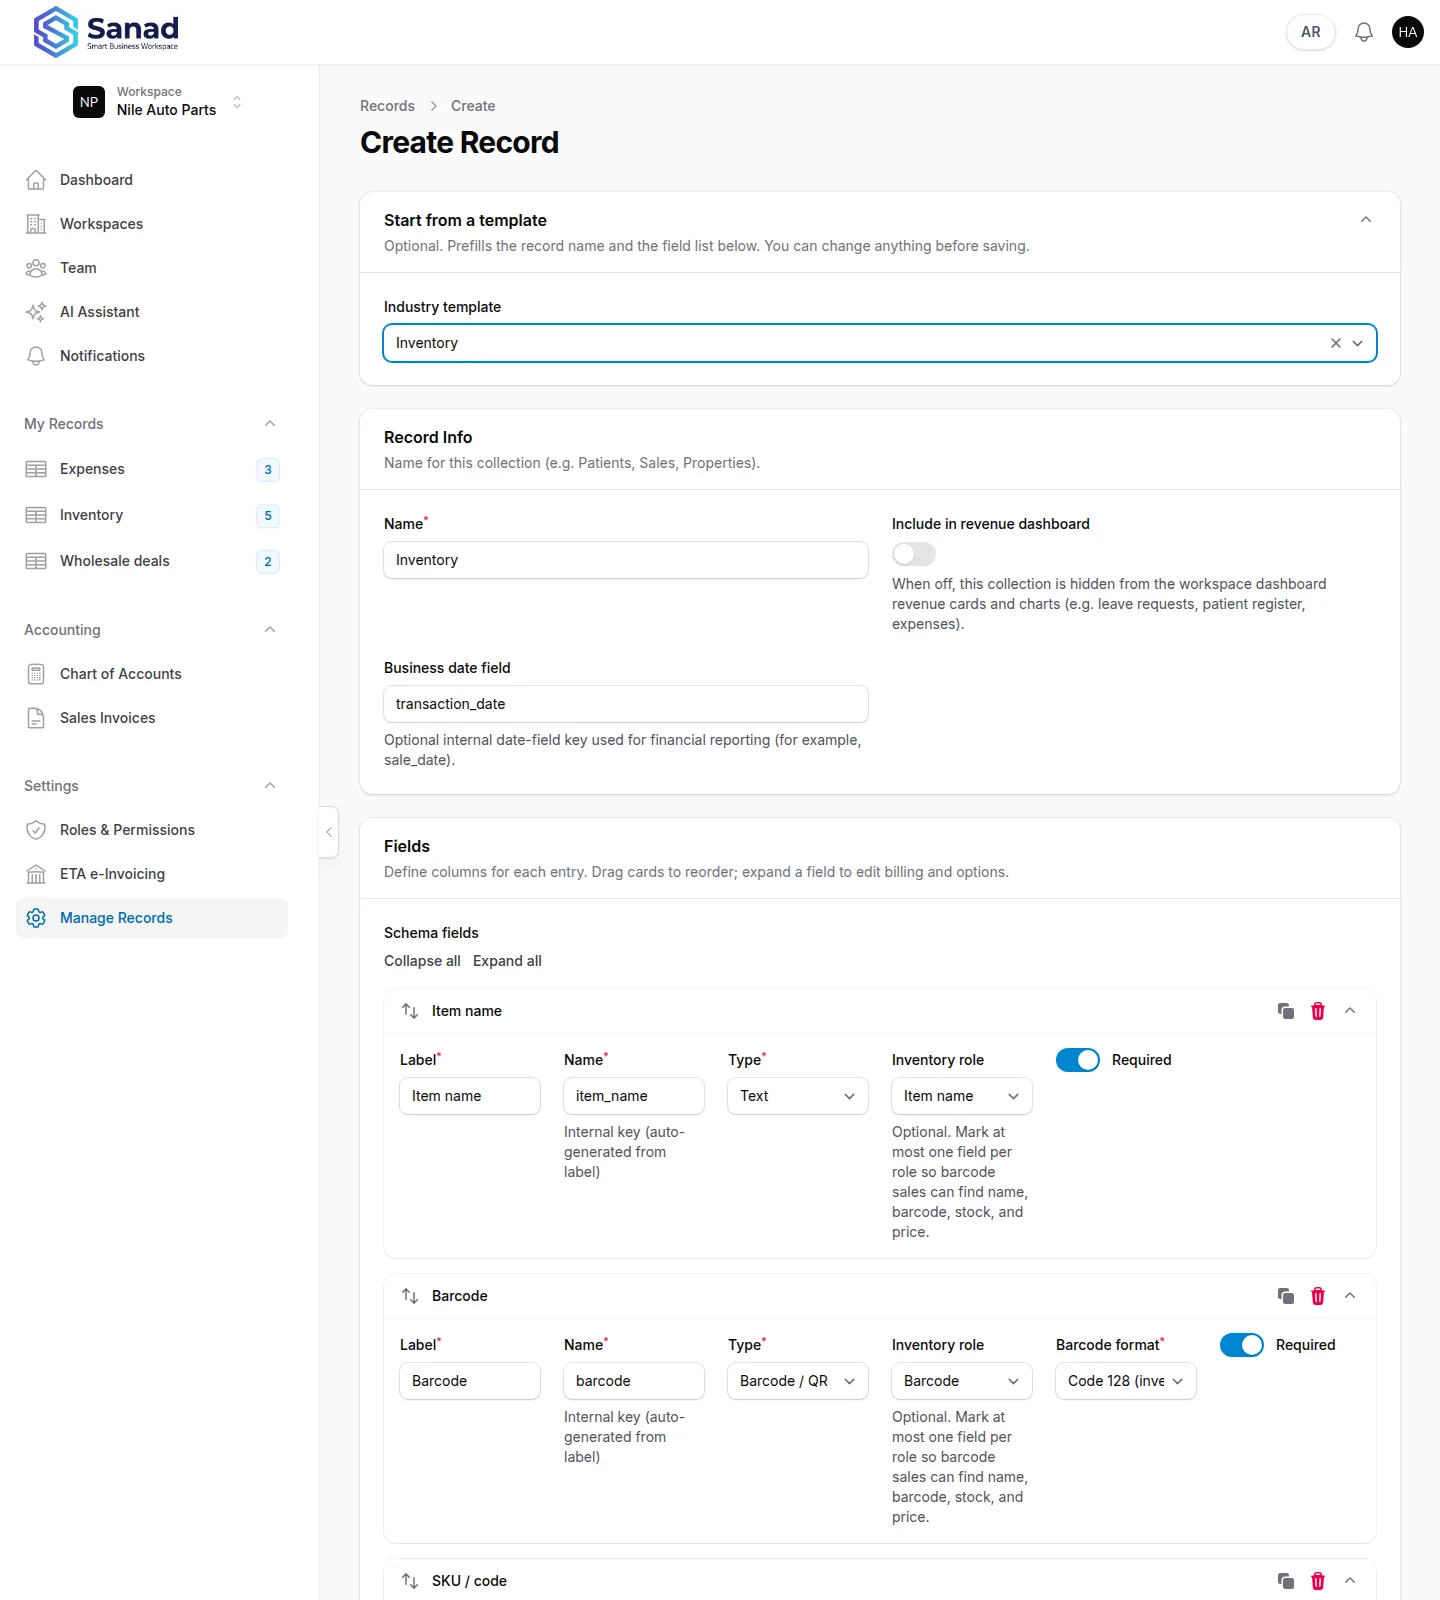
-
Step 2
Add product rows
Open Inventory under My Records. Add Entry for each product: Item name, Barcode (type one or click Generate unique code), Quantity on hand, Unit cost (EGP), Sale price. Optional: Supplier, Notes, and Download barcode for a shelf label. These rows are the catalog — they are not invoices yet.
Screenshots show the English workspace UI.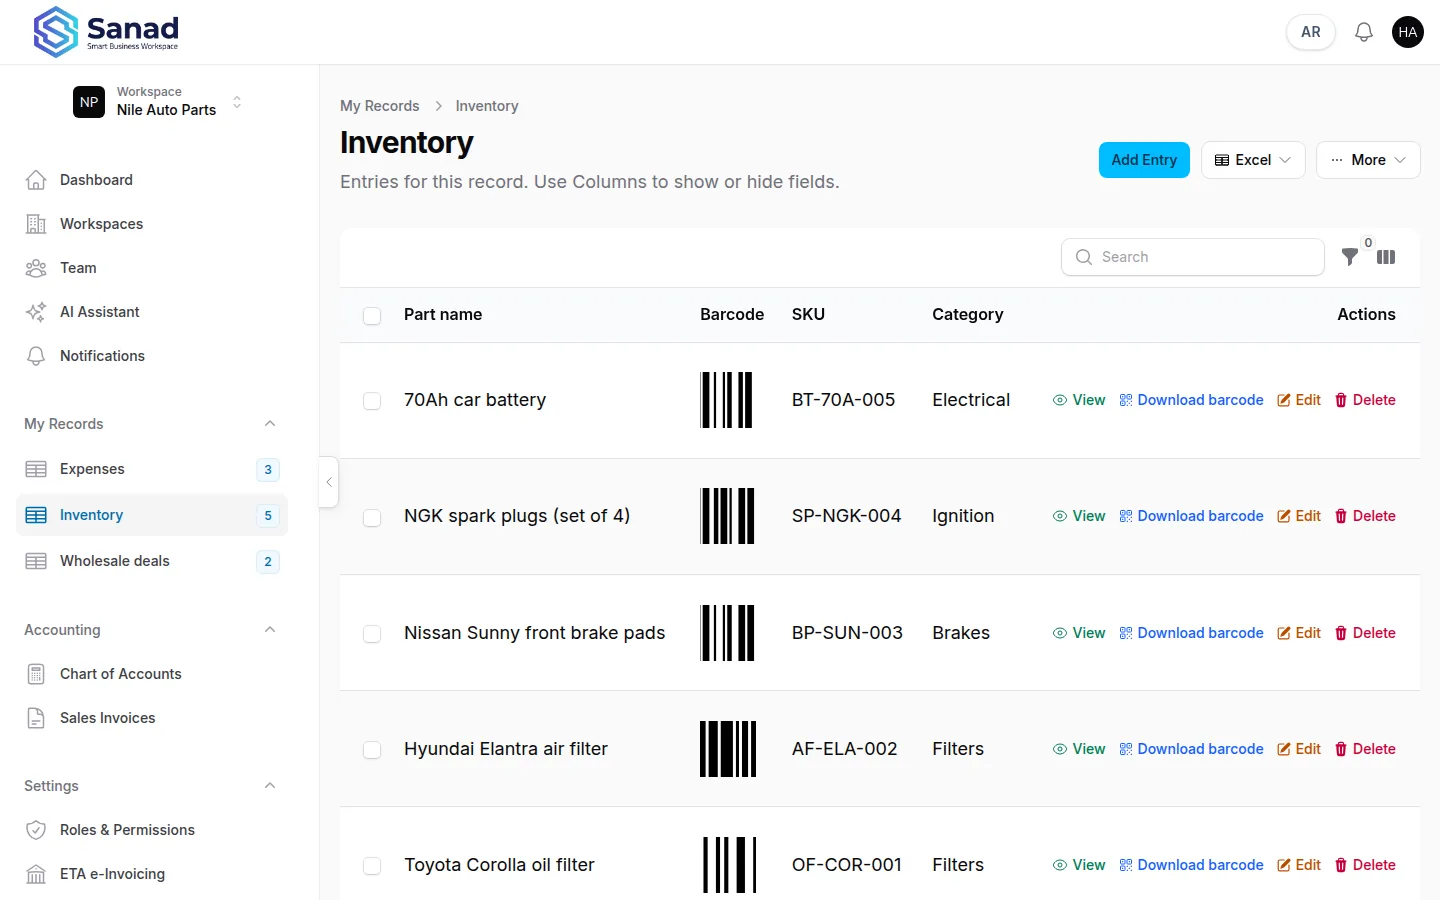
-
Step 3
Scan products onto a sales invoice
Accounting → Sales Invoices → Create. Under Scan inventory, Inventory record is your catalog (the workspace remembers it). Scan barcode or type and press Enter — each scan adds a line; it does not Save. Keep scanning, then Save. Scanned lines inherit the catalog sale price; Discount and Discount % cannot be typed by hand on inventory-linked lines — only Qty is editable there. Invoice discount % (with Apply to all lines) can still discount scanned lines by percentage. Use Add line for a one-off manual discounted item (that skips stock).
Screenshots show the English workspace UI.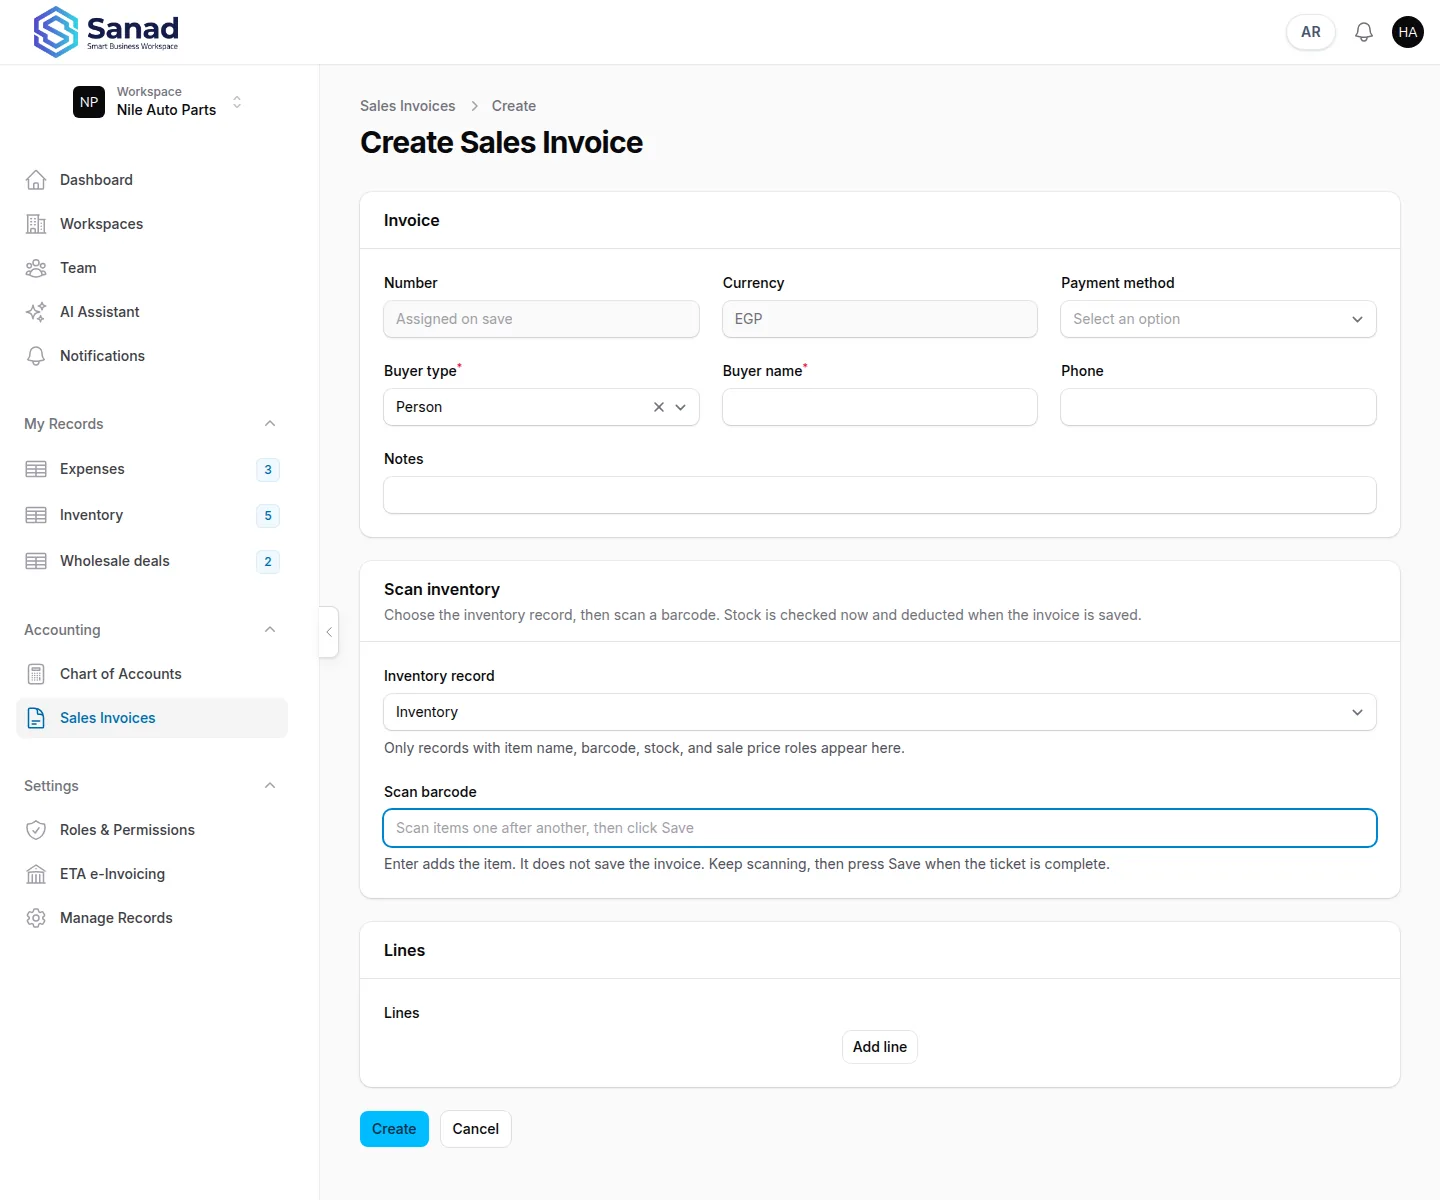
-
Step 4
Same lines on Print and ETA
Print, Send now, and Download ETA PDF use the same lines. Print anytime. Send now when Ready for ETA. Download ETA PDF after Accepted. There is no second ETA product list.
Screenshots show the English workspace UI.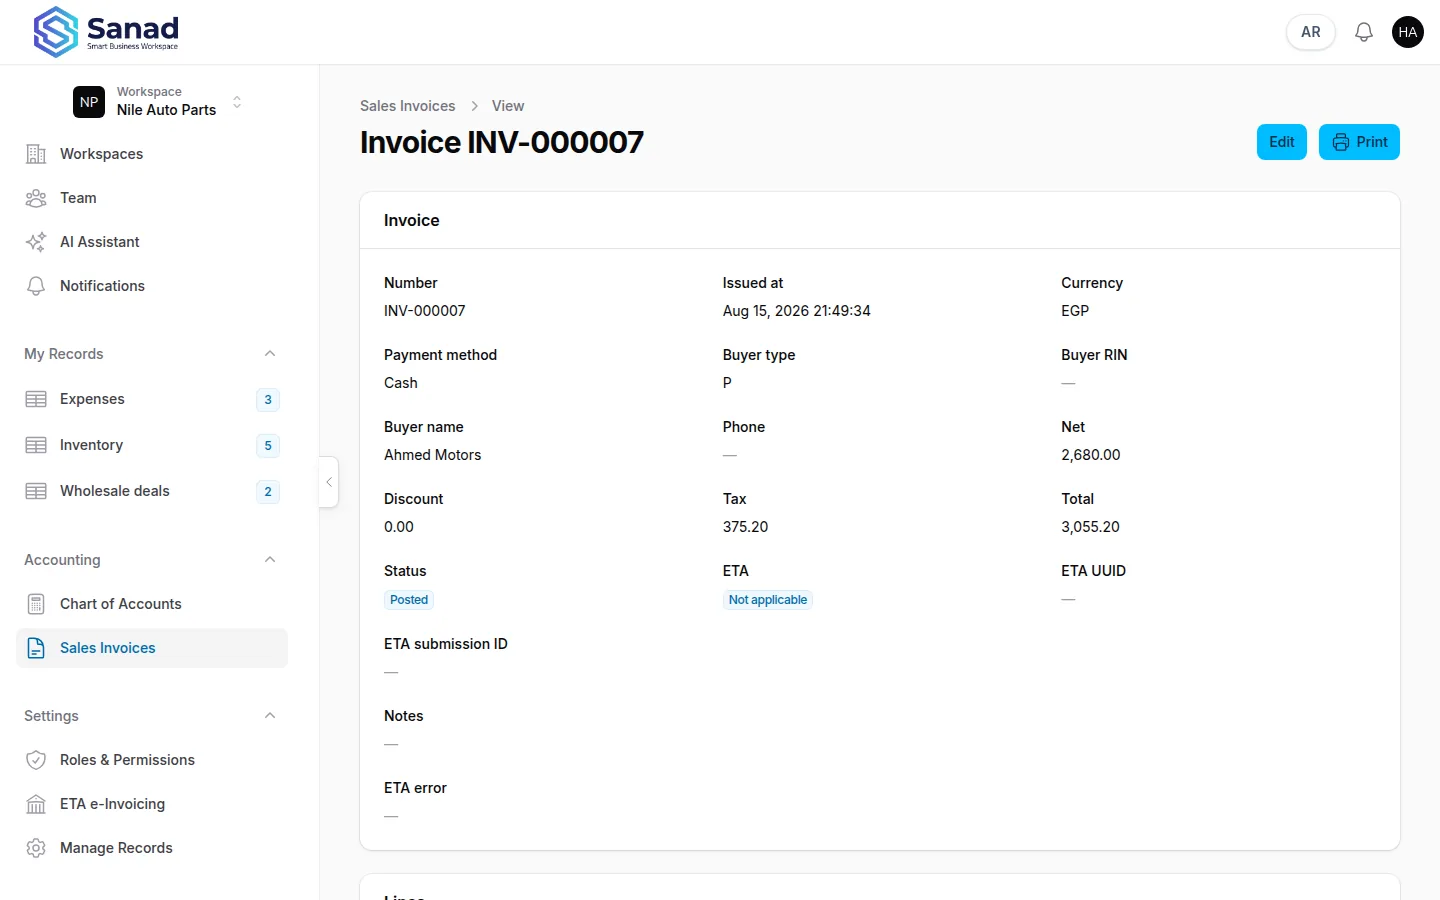
Short walkthrough
Related articles
Design a record list
Create a custom list: pick a template or start blank, set the name and dashboard options, add columns, then save. Daily entry is in My Records.
Add and manage entries
Open a list under My Records, add or edit rows, import Excel, filter the table, and download a barcode label when the list has a barcode field.
Sales invoices
Create, print, correct, and optionally send Egyptian-pound invoices, with per-line discounts, an internal Number (INV-…) and a separate ETA number (ETA-…), plus local and ETA statuses.
ETA e-invoicing
Connect the workspace to the Egyptian Tax Authority and submit posted invoices.